Instructions for self-measurement
Dear cyclists,
Every Pasculli project starts with a measurement. Based on your body measurements, such as your inseam and crotch length, we find the perfect frame size and develop a customized frame geometry for you.
Scroll down to find out how you can determine your body measurements with the help of a second person.
Preparation and utensils
You need:
- a second person to help
- a folding rule
- a spirit level, at least 50 cm long
- Adhesive dots
- cycling shorts
- a free wall
- a chair
- a pen and paper
Please read the entire presentation through to the end before you start measuring.
Take off your shoes and put on your cycling shorts.
Go to the free wall with the utensils and the chair.
Have a pen and paper ready to write down your measurements.
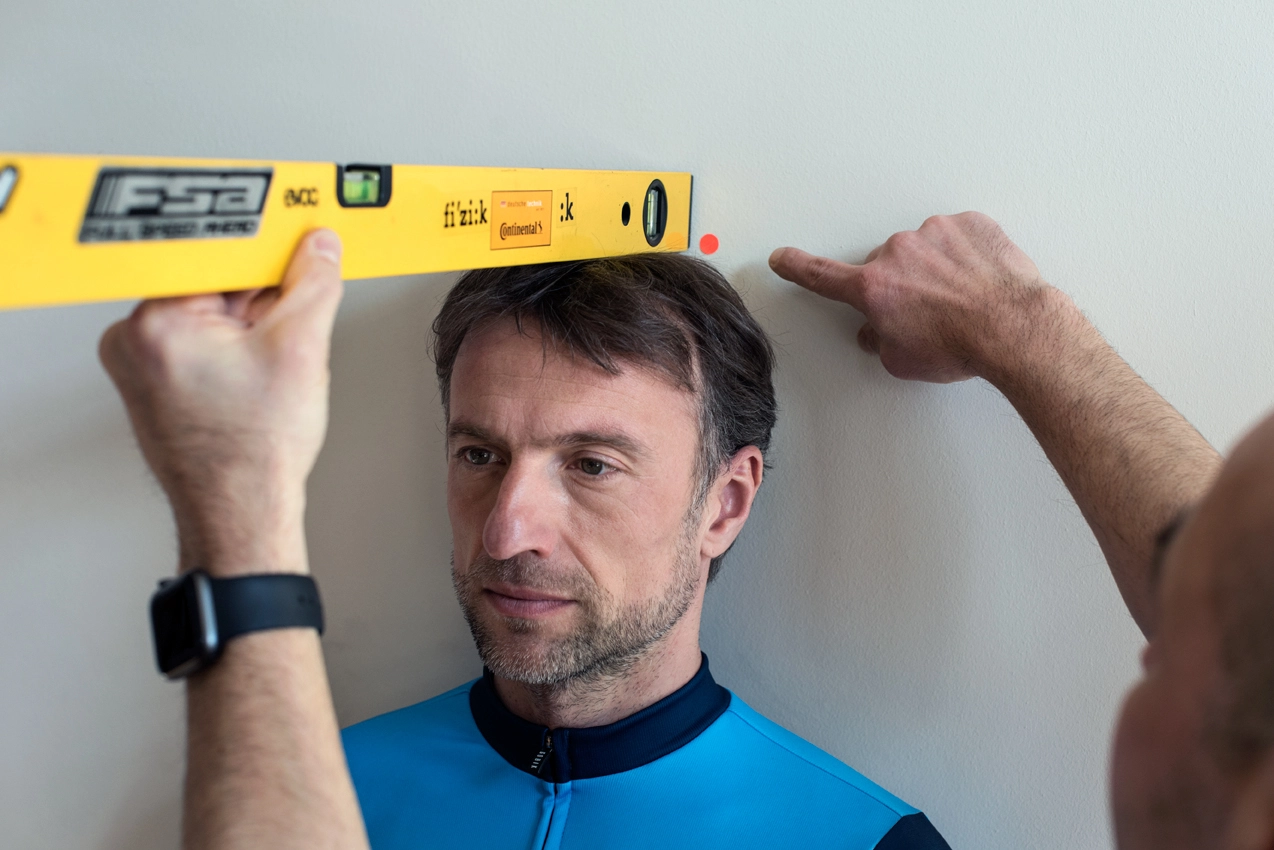
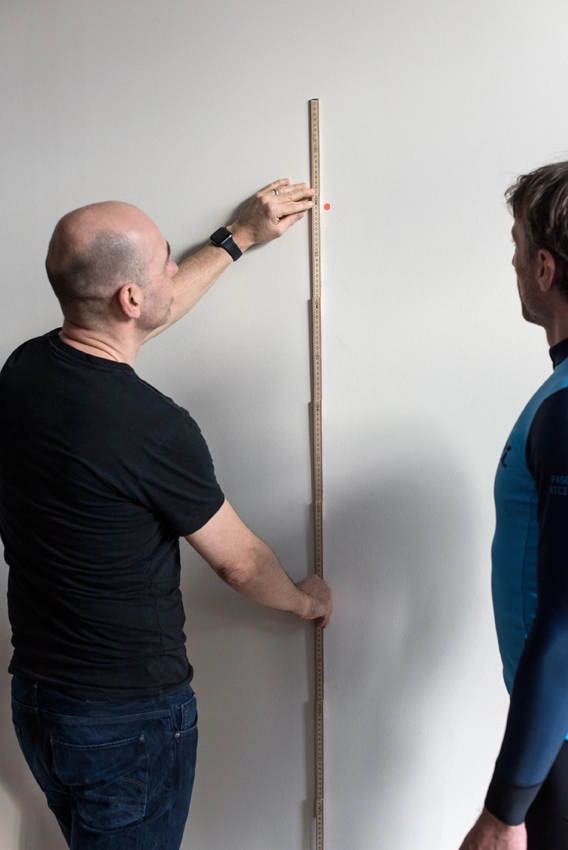
1. body size
- Stand up straight and lean your back against the wall. Place the spirit level on your head so that its rear end touches the wall.
- Make sure that the spirit level is parallel to the floor. Place an adhesive dot at the point where the bottom edge of the spirit level touches the wall.
- The lower edge of the marking is on the same line as the lower edge of the spirit level.
- Then step away from the wall. Now measure the distance from the floor to the lower edge of the marking point.
- Make a note of your height.
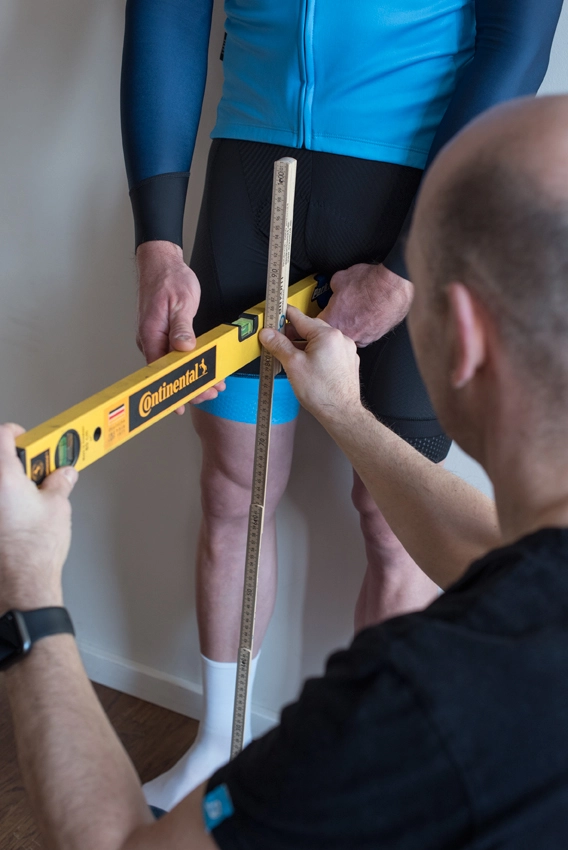
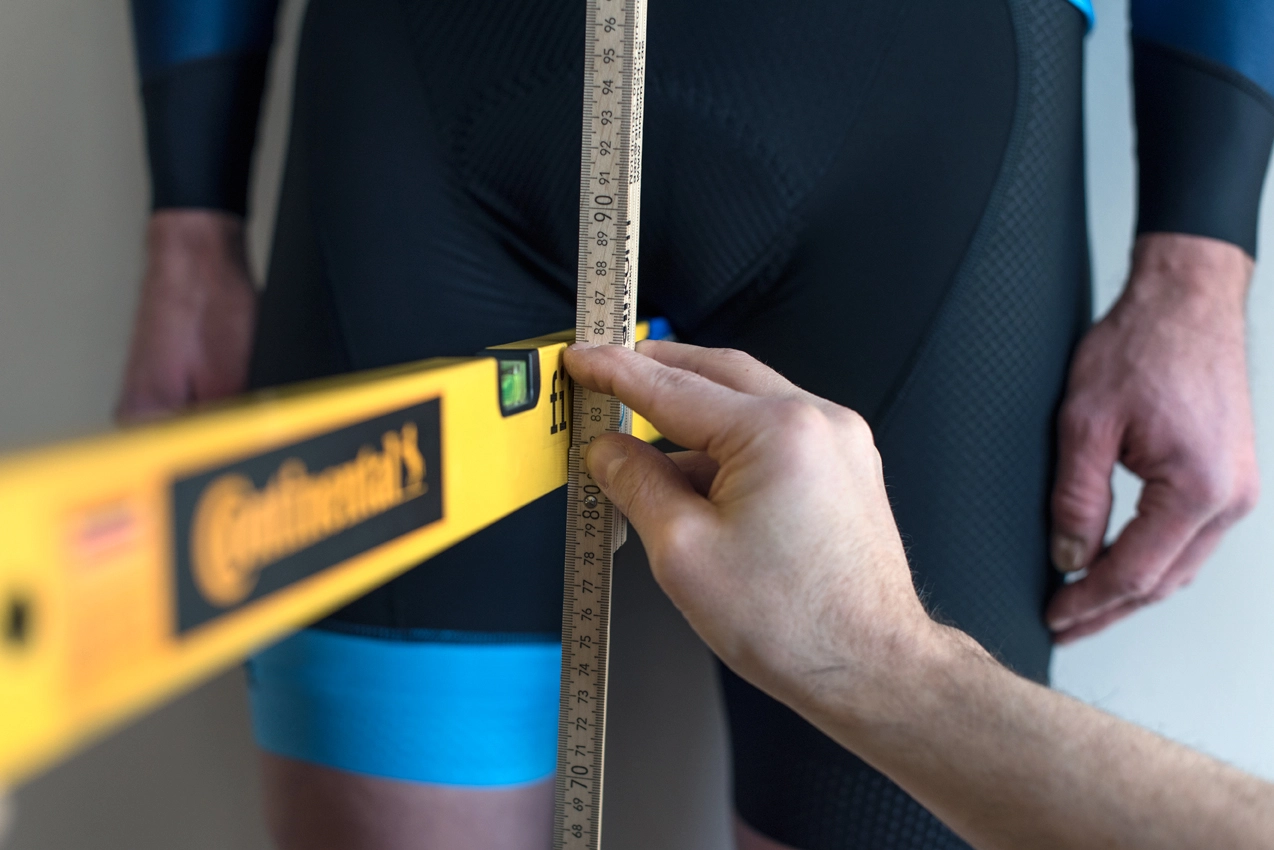
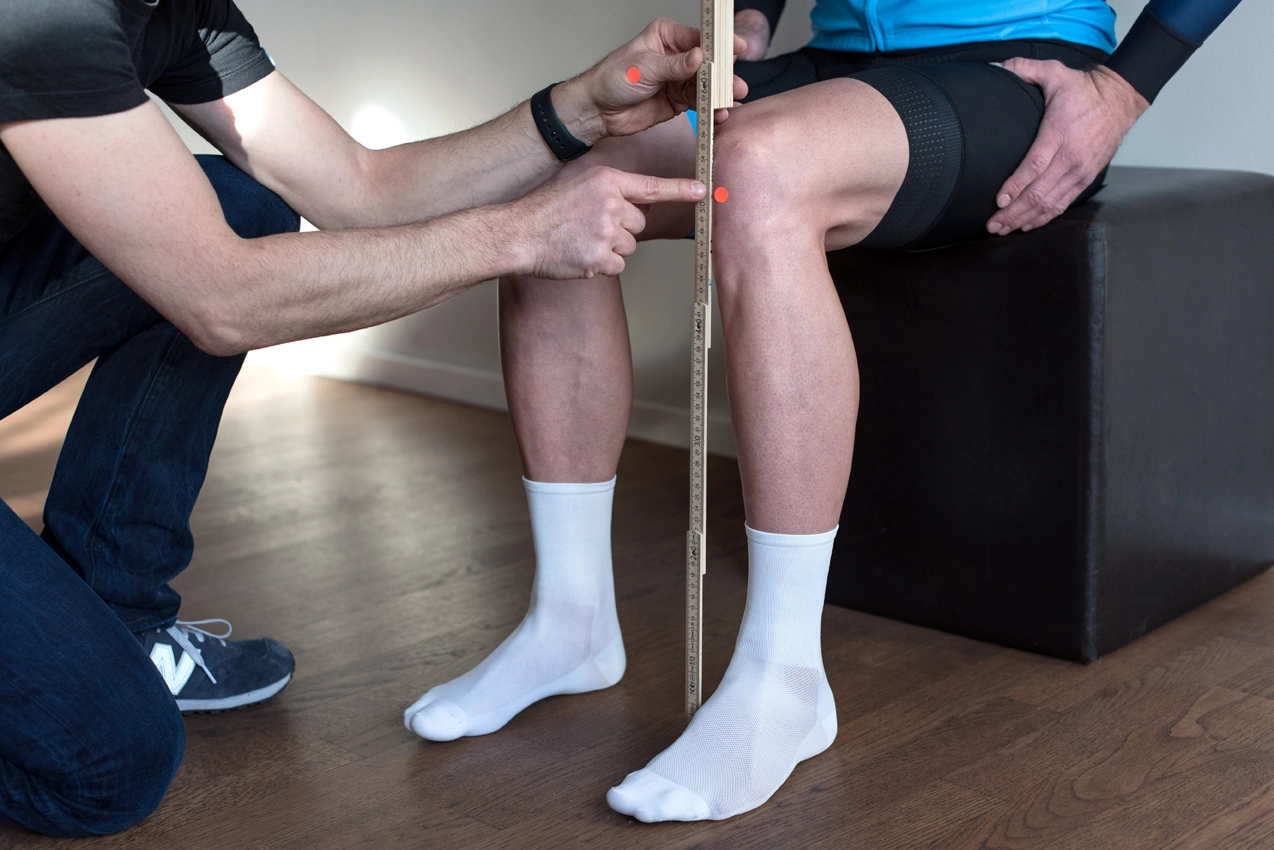
2. stride length
- Stand upright against the wall again and place the spirit level between your legs.
- Raise the spirit level at the crotch so that the contact pressure is comparable to the pressure with which you are sitting on the saddle.
- Make sure that the spirit level is parallel to the floor in the scale.
- The folding rule is now placed at right angles to the spirit level to measure from the top edge of the spirit level to the floor.
- Note your stride length.
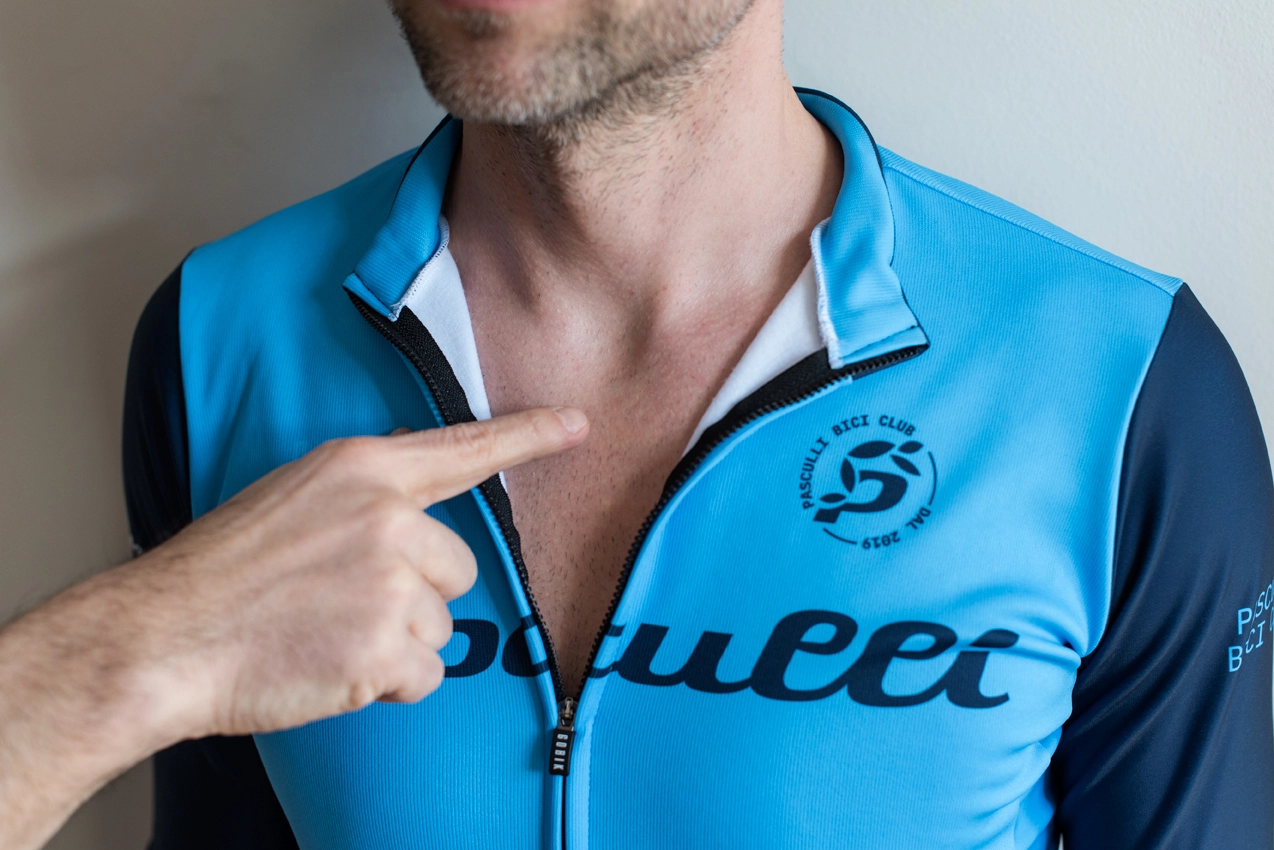
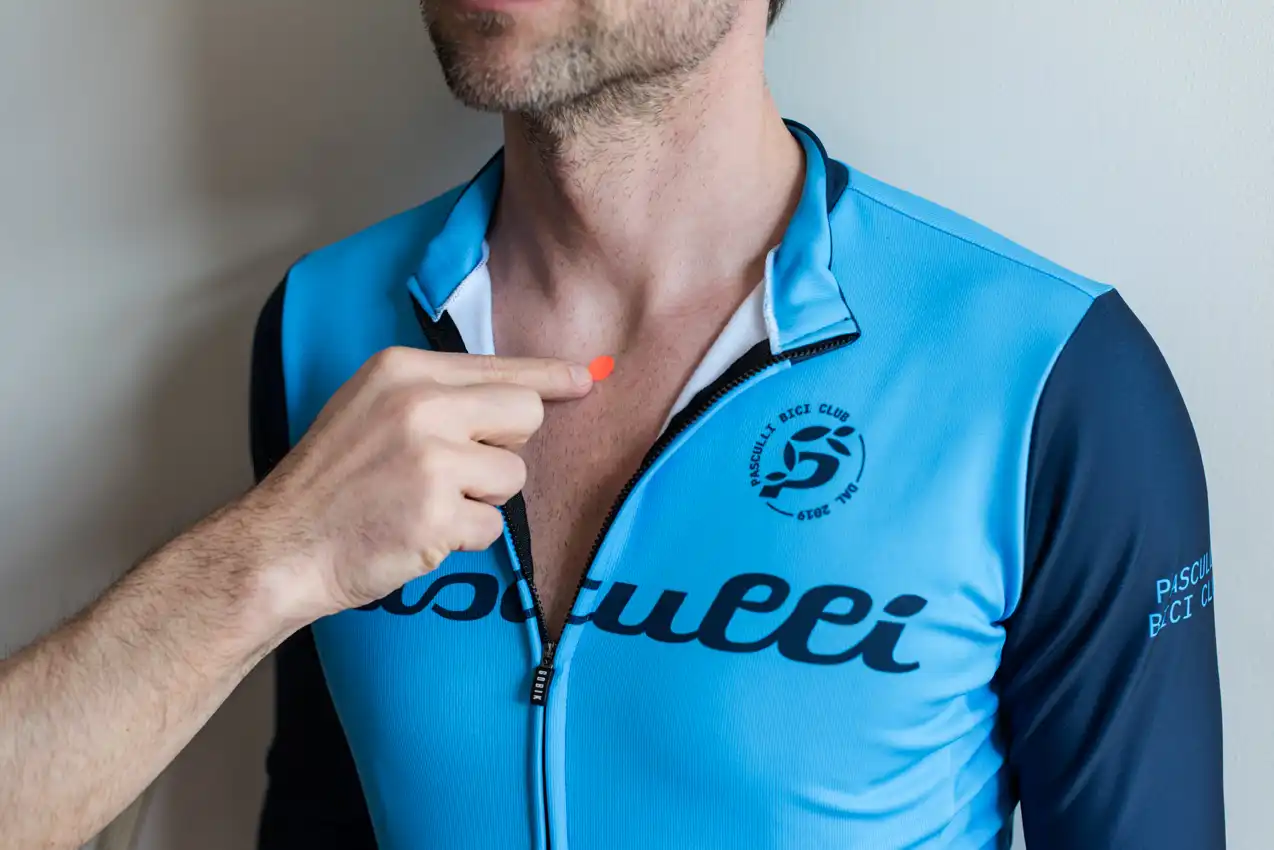
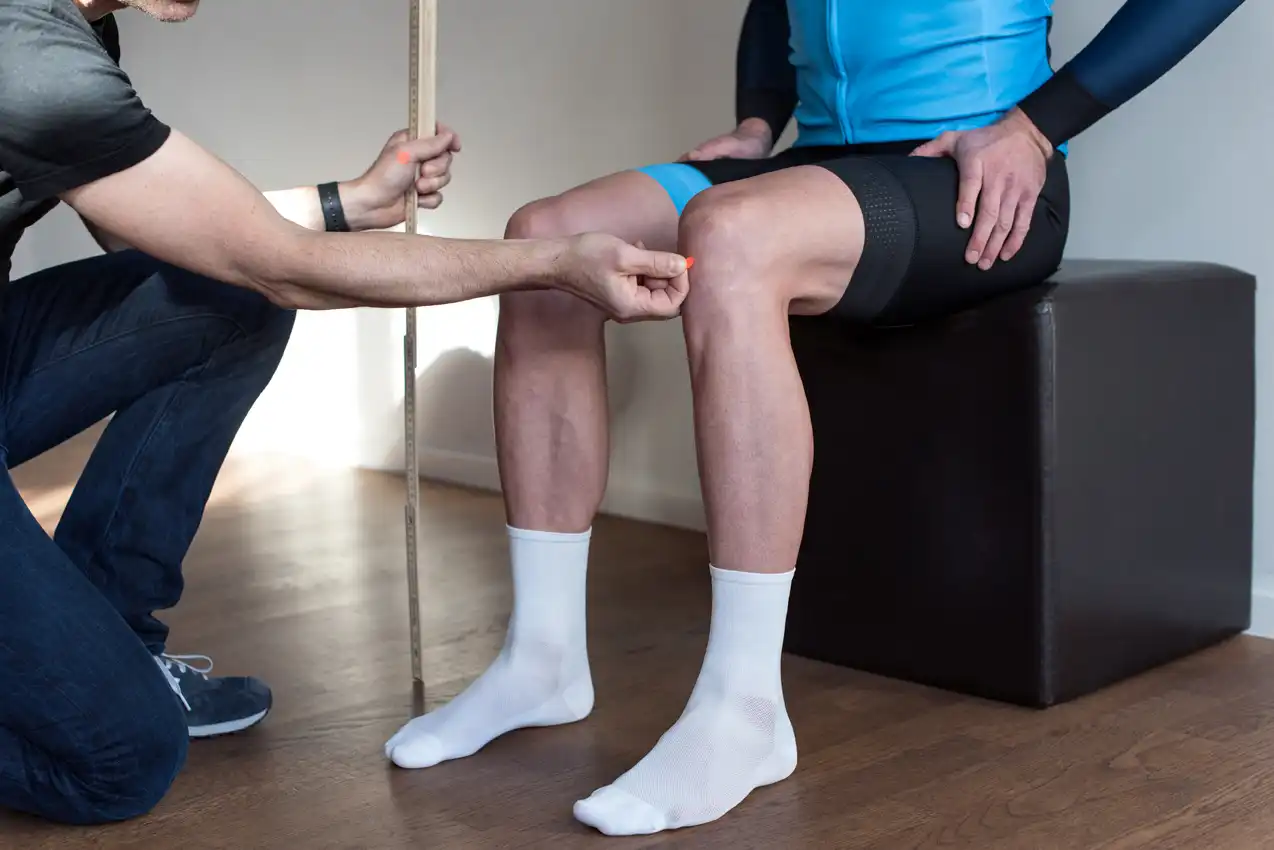
3. upper body length
- Stand upright against the wall and hold the spirit level between your legs as in step 2.
- Now use a marker to mark the lowest point of your “choke” pit (this is located at the neck between the two ends of the collarbone).
- The lower edge of the marking point touches the upper edge of the sternum. Now measure the distance from the upper edge of the spirit level to the lower edge of the marking point.
- Note your torso length.
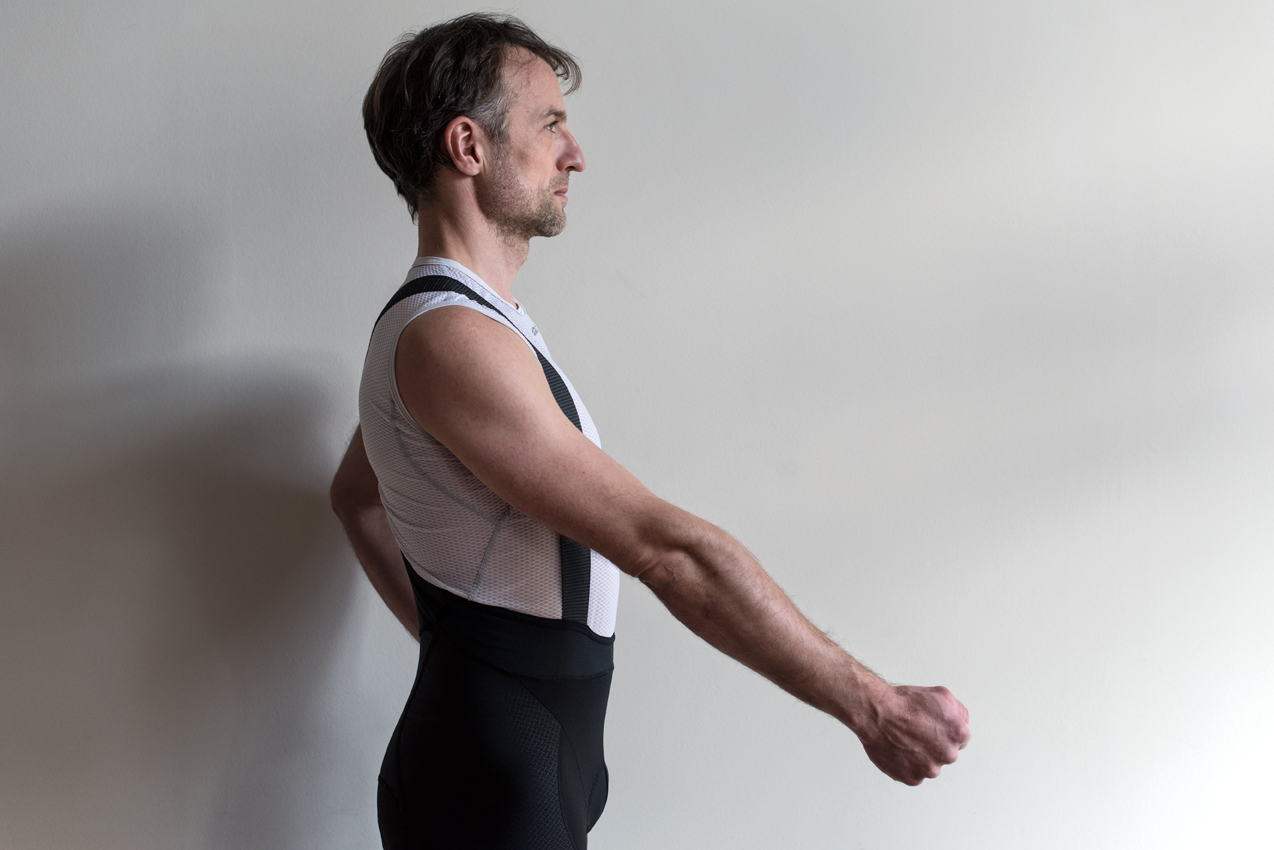
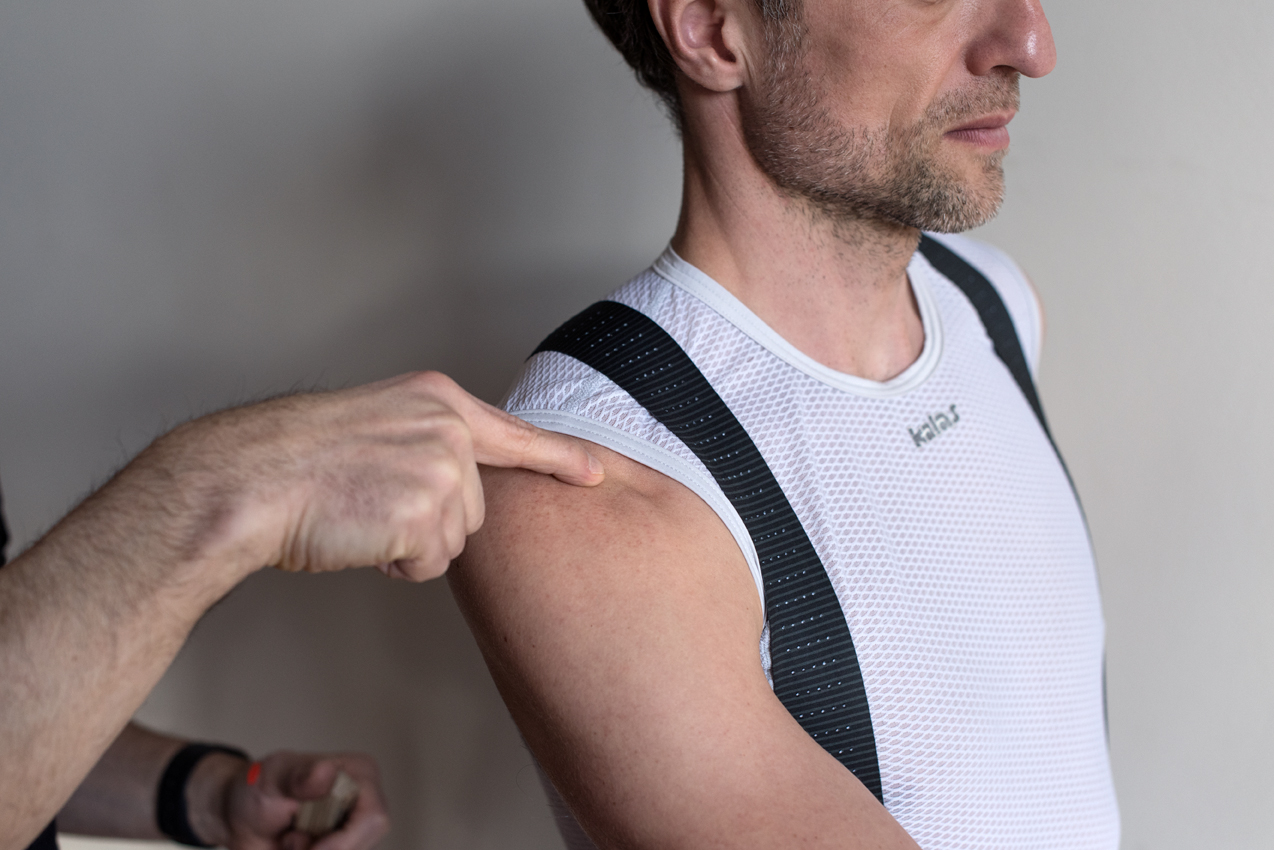
4th arm length
- To determine your arm length, please take off your T-shirt.
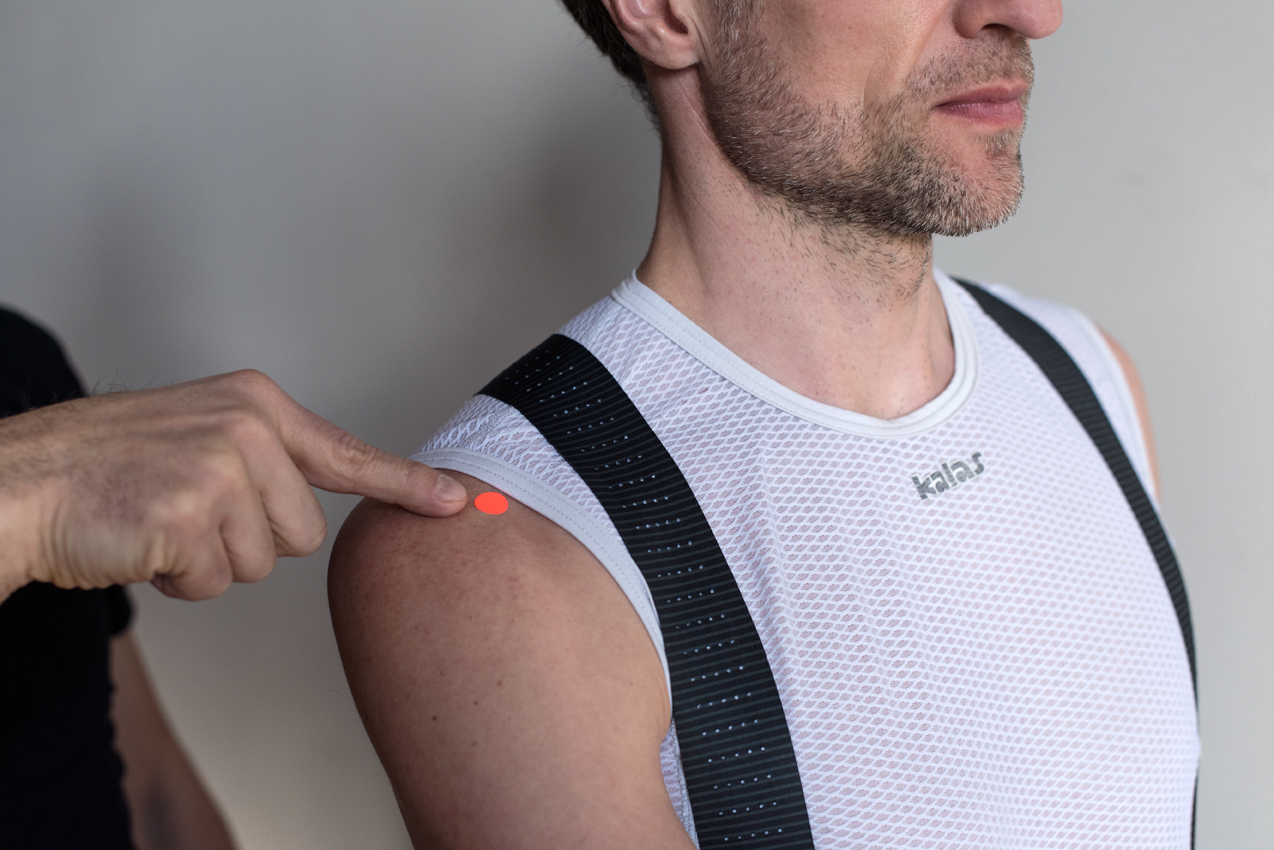
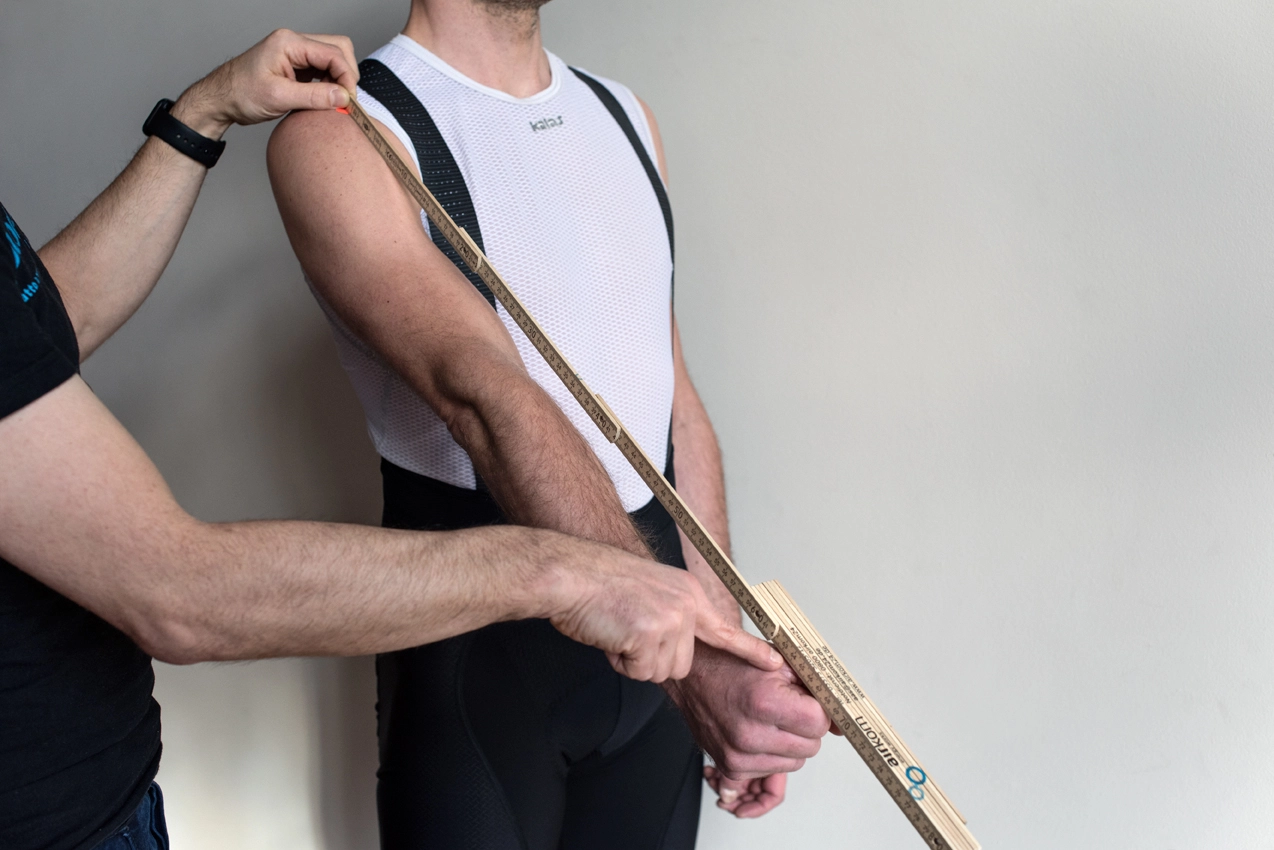
Extend your right arm forward so that it is at a 45° angle to the longitudinal axis of your body and form a loose fist with your hand. Your thumb and index finger should be pointing towards the ceiling. - A marking point is placed on your acromioclavicular joint.
- Then measure the distance between the center of the mark and the center of the circle formed by the index finger of your loose fist.
- Note your arm length.
You can enter your measurements with every bike inquiry so that we can provide you with the best possible advice.